3.13 - How to Draw Ray Diagrams
Real and virtual images
- Real image - Forms where light rays actually meet. It can be captured on a screen (e.g. the image formed on the retina).
- Virtual image - Forms where light rays only appear to come from because the rays are diverging. It cannot be captured on a screen (e.g. a reflection in a plane mirror or the image seen through a magnifying glass).
To describe an image fully, state three things:
- Size compared with the object - enlarged (magnified), the same size, or diminished (smaller)
- Orientation - Upright or inverted (upside down)
- Nature - Real or virtual
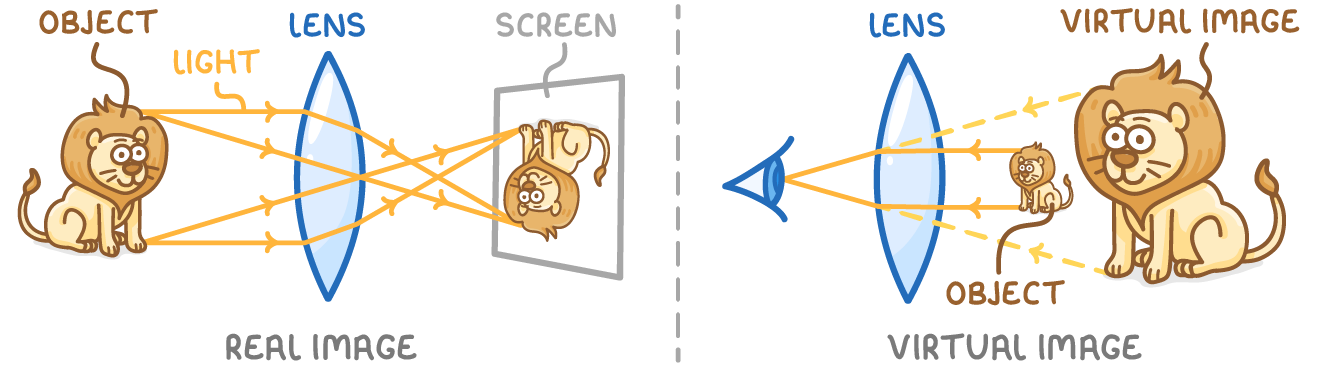
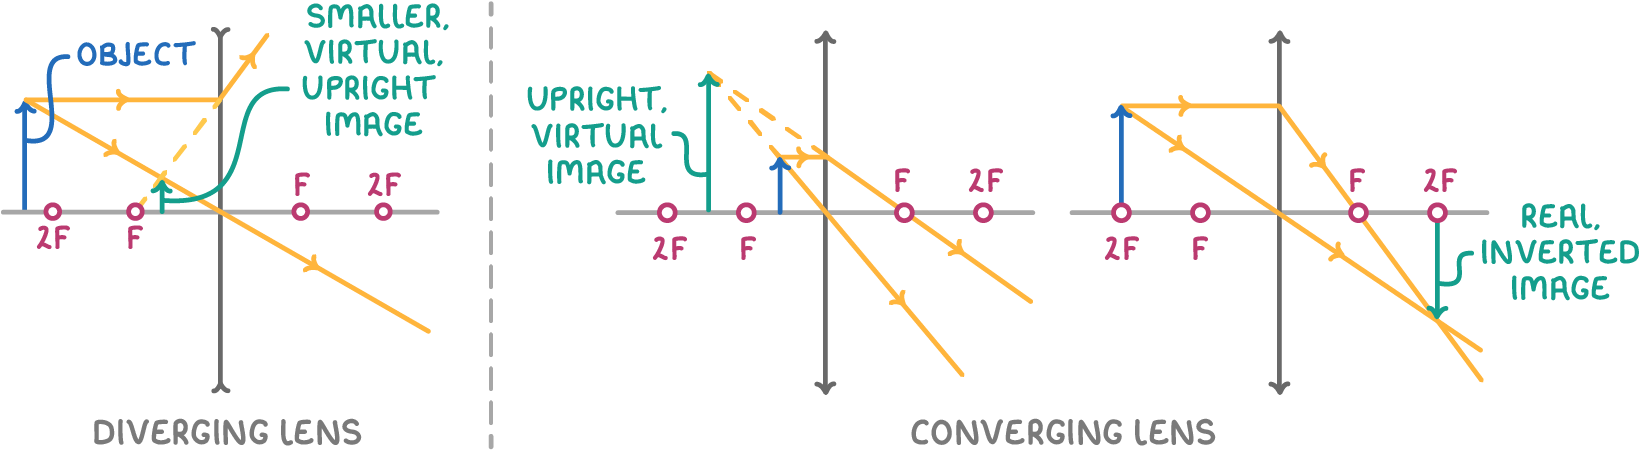
Ray diagram for a converging (convex) lens
Only two rays from any point on an object are needed to locate that point on the image.
Finding the top of the image
- From the top of the object, draw a ray parallel to the principal axis. After the lens it refracts through the principal focus (F) on the far side.
- From the top of the object, draw a second ray straight through the centre of the lens - this ray carries on without bending.
- Where the two refracted rays cross is the top of the image.
If the bottom of the object sits on the principal axis, draw the image straight down from the crossing point to the axis.
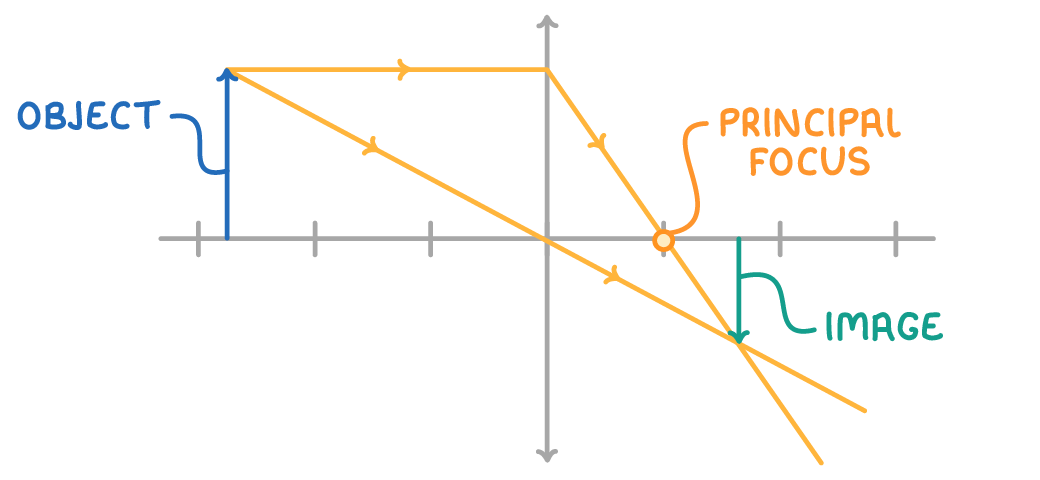
Drawing conventions
- A real image is drawn as a solid arrow; a downward arrow shows it is inverted.
- The lens is drawn as a single vertical line, with rays bent once at that line rather than at each surface.
How object distance affects the image (converging lens)
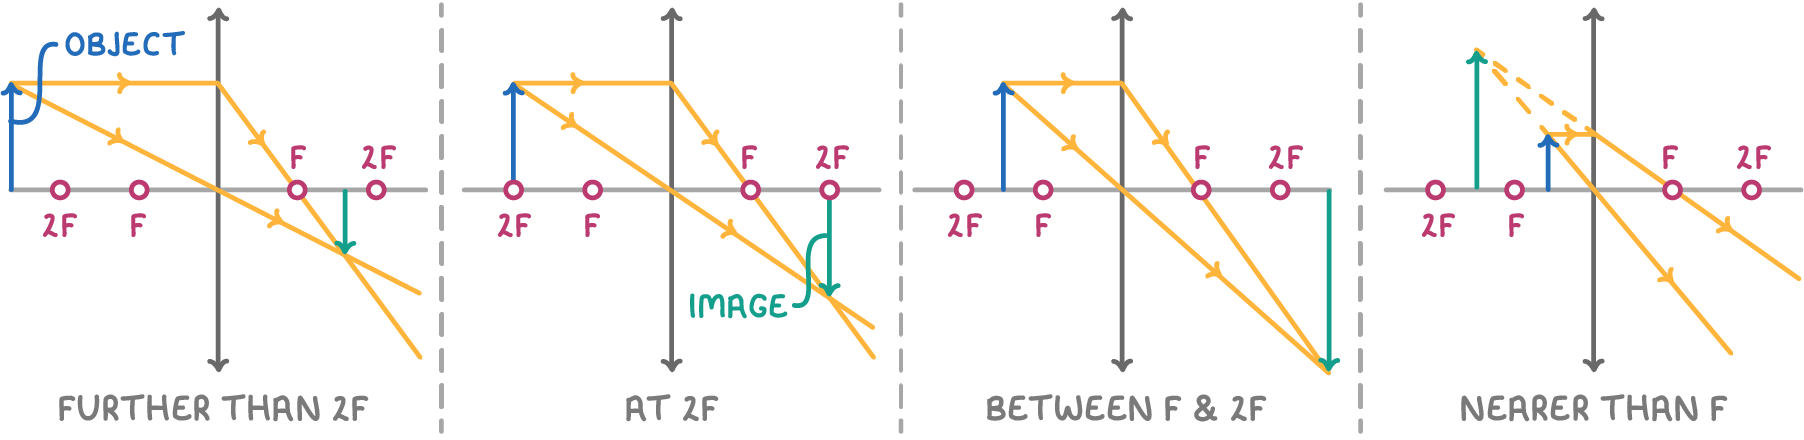
For a converging (convex) lens, where the object is placed relative to the principal focus (F) and 2F determines the image formed.
| Object's position | Image size | Upright/inverted | Real/virtual | Image position |
|---|---|---|---|---|
| Further than 2F | Smaller | Inverted | Real | Between F and 2F |
| At 2F | Same size | Inverted | Real | At 2F |
| Between F and 2F | Bigger | Inverted | Real | Beyond 2F |
| Nearer than F | Bigger | Upright | Virtual | Same side as the object |
- When the object is beyond F, the image is always real and inverted on the far side.
- When the object is inside F, the image is virtual, upright and enlarged on the same side as the object.
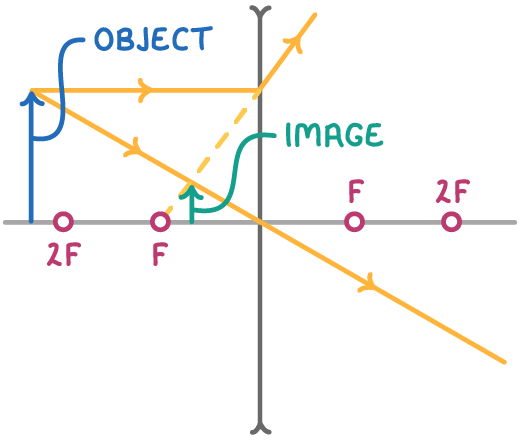
Ray diagram for a diverging (concave) lens
Finding the top of the image
- From the top of the object, draw a ray parallel to the principal axis. After the lens it refracts so that it appears to come from the principal focus (F) on the same side as the object. Draw the refracted ray as a solid line and trace it back to F as a dashed line.
- From the top of the object, draw a second ray straight through the centre of the lens - it carries on without bending.
- The top of the image is where the central ray meets the dashed line.
A diverging lens always produces an image that is:
- Virtual
- Upright
- Smaller than the object (diminished)
- On the same side of the lens as the object
Comparing converging and diverging lenses
Key differences
- A diverging lens always produces an image that is virtual, upright and diminished, on the same side as the object.
- A converging lens can produce real or virtual, upright or inverted, and enlarged or diminished images, depending on where the object is placed.
Shared features
- Both have a principal focus on each side, lying on the principal axis.
- A ray passing through the centre of either lens carries on without bending.
TermDefinition
Real imageAn image formed where light rays actually meet, which can be captured on a screen.
Virtual imageAn image formed where light rays only appear to come from, which cannot be projected onto a screen.
Key points to remember
How were these notes?